
Images are usually the heaviest files a WordPress page loads, so they are the first place to look when a site feels slow. The good news is that most of that weight can go without anyone noticing a difference. This guide walks through WordPress image optimization in the order that gives the most back for the least risk.
What "without losing quality" really means
There are two kinds of compression, and it helps to know which one you are choosing.
- Lossless compression repacks a file more efficiently and strips data nobody sees. Every pixel stays the same. Savings are modest.
- Lossy compression throws away detail the eye is poor at noticing. Done sensibly, a photo looks the same at normal viewing size and the file is far smaller. Pushed too hard, you start to see blocky patches and smeared edges.
For most websites the goal is not "no change at all" but "no change a visitor can see". That is what a balanced lossy setting gives you, and it is the right default for photos. Reserve lossless for images where exact pixels matter, such as product shots that will be zoomed, medical or technical images, or artwork you sell.
Step 1: Start with the right dimensions
No compression setting rescues an image that is far larger than it needs to be. A 6000 pixel wide photo straight from a camera, shown in a column 800 pixels wide, wastes most of its bytes.
WordPress helps here more than people realise:
- It creates several smaller sizes of every upload (thumbnail, medium, large and others) and lets the browser pick the best fit.
- Since version 5.3 it scales very large uploads down to 2560 pixels on the longest side and uses that as the full-size image.
Even so, check your theme. If your content column is 1200 pixels wide, a 2560 pixel full-size image is still more than you need. Setting a lower maximum is the single biggest saving available on photo-heavy sites. How to reduce WordPress image sizes covers this in detail.
Step 2: Compress at a sensible level
WordPress already compresses the smaller sizes it generates, at a JPEG quality of 82 by default. It does not recompress the full-size file you uploaded, and it does not squeeze PNG files much at all. That is the gap an image optimization plugin fills.
A good WordPress image compression plugin gives you a small number of clear levels rather than a quality slider you have to guess at. In LeanPixel there are three:
| Level | What it does | Good for |
|---|---|---|
| Lossless | Repacks the file, changes no pixels | Images that must be exact |
| Balanced | Lossy, tuned so the change is not visible at normal size | Most sites; the default |
| Aggressive | Smallest files, slight loss of quality | Image-heavy pages where speed matters most |
Whatever tool you use, compress from the original, once. Compressing an already compressed JPEG again stacks up damage for little gain. LeanPixel leaves a file alone if it would shrink by less than 5%, for exactly that reason.
Step 3: Add WebP and AVIF versions
JPEG and PNG are decades old. WebP and AVIF are newer formats that describe the same picture in fewer bytes. Every current major browser can display WebP, and almost all can display AVIF.
The safe way to use them is to keep your JPEG or PNG and add the newer versions alongside. Browsers that understand the new format are sent it; older ones still get the original. Your page content does not change.
Which format to prefer, and when AVIF is worth the extra processing, is covered in WebP vs AVIF for WordPress.
Step 4: Keep your originals
Optimization should be reversible. Before you let any tool rewrite your media library, make sure it keeps a copy of each original and can put it back.
LeanPixel keeps every original in a private folder by default and adds a "Restore original" link to each image in the media library. Once you are happy with the results you can delete the kept copies to free the disk space.
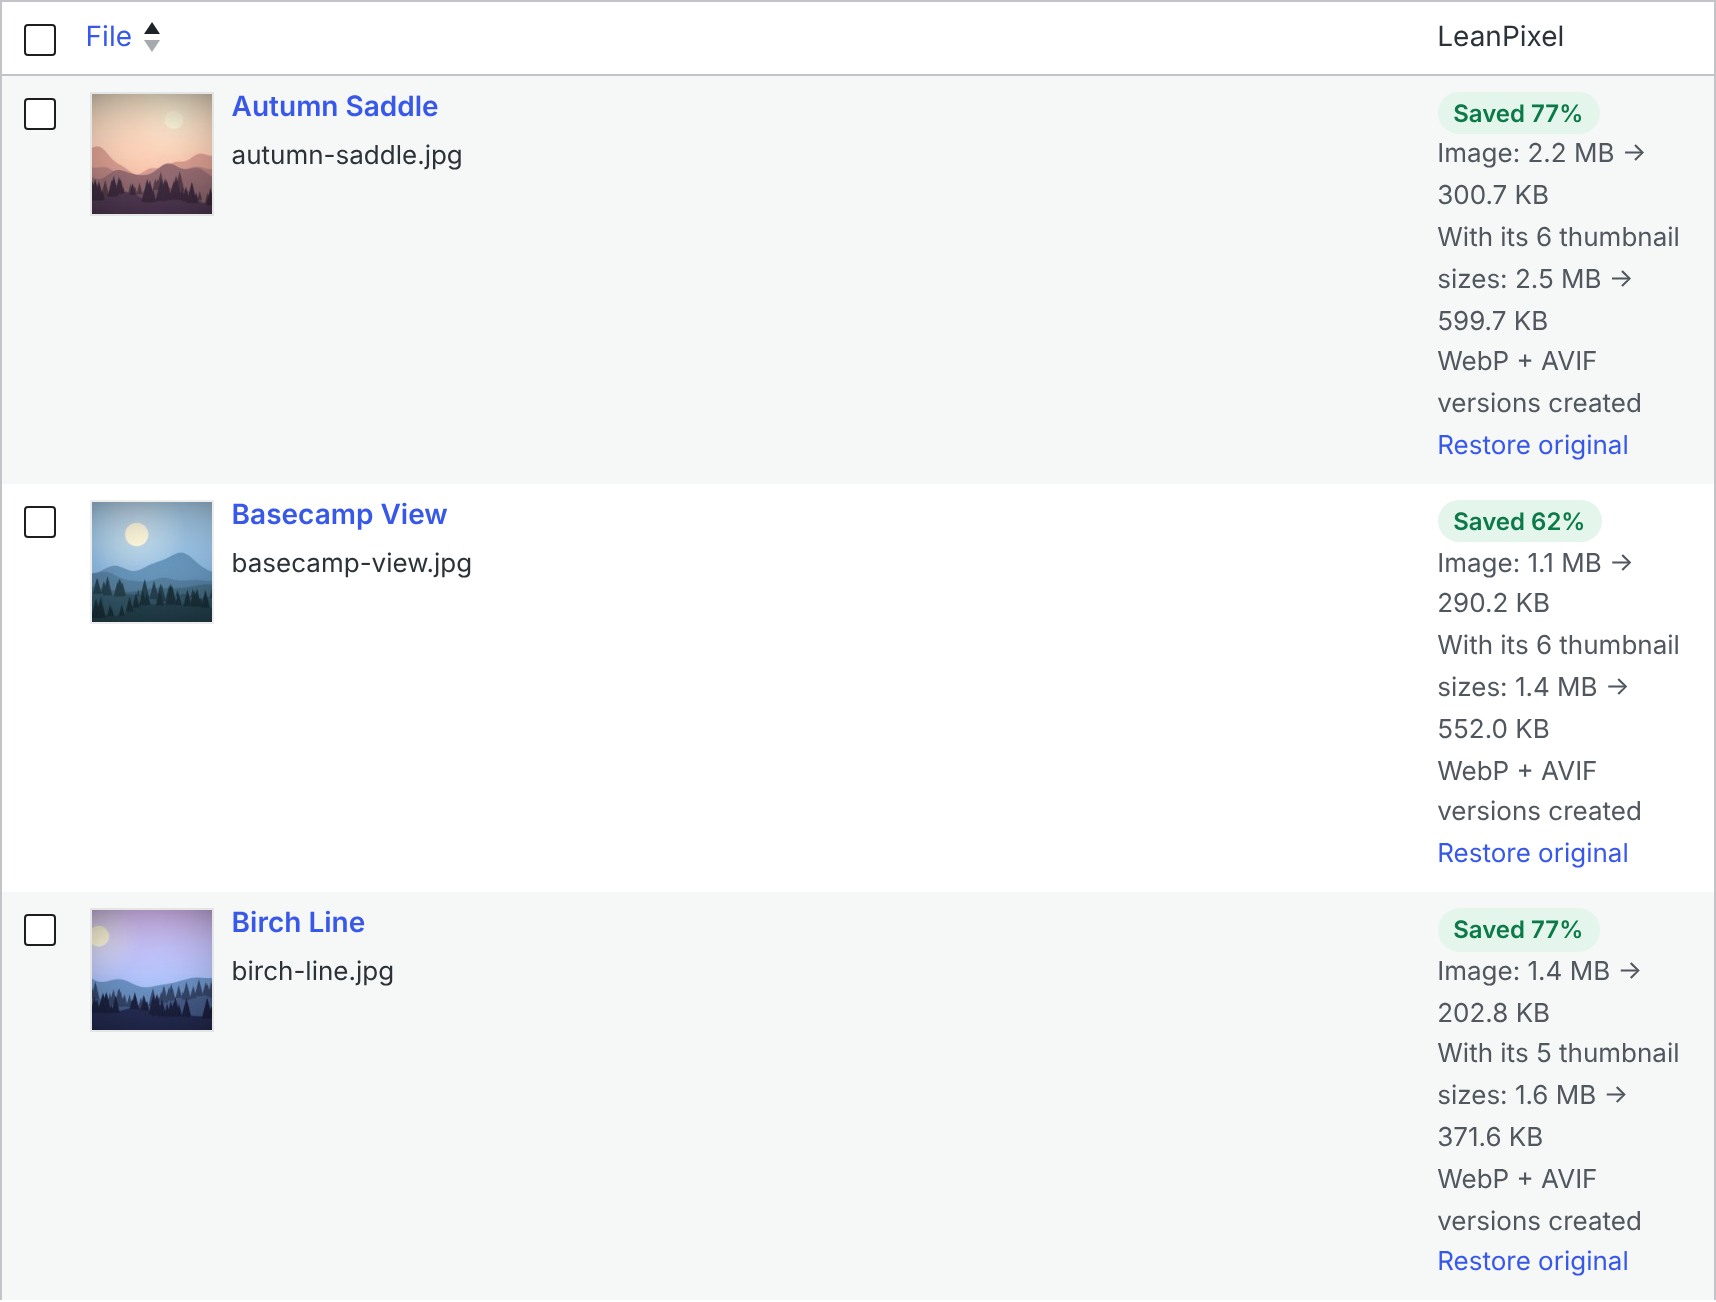
Step 5: Do the whole library, then every new upload
Optimizing only new uploads leaves years of heavy images in place. Run a bulk pass over the existing library first, then let new uploads be handled automatically. How to bulk optimize your WordPress media library walks through it.
Step 6: Check the result with your own eyes
Open a few of your most important pages before and after. Look at faces, text inside images, gradients such as skies, and anything with fine texture. If you can see a difference at normal size, step down a level for those images or restore them.
Things that are not worth doing
- Lowering quality until it hurts. The last few percent of saving costs the most in visible damage.
- Converting everything to PNG "for quality". PNG is the wrong format for photos and makes them much larger.
- Optimizing the same image with two plugins. Pick one tool and switch the other off.
Try it on your own site
If you want numbers for your own pages before installing anything, the free WordPress image optimization test measures the images on any page you enter. When you are ready, LeanPixel is free for 1,000 images a month.