
When a WordPress page is slow, the cause is very often an image that is much bigger than it needs to be: a photo straight from a phone or camera, displayed in a space a fraction of its size. Compression helps, but dimensions come first. This guide is about getting image sizes right, then keeping them right.
Two meanings of "size"
- Dimensions: how many pixels wide and tall the image is.
- File size: how many kilobytes or megabytes it takes to download.
They are linked. Halving the width and height of a photo cuts the number of pixels to a quarter, and the file size falls with it. That is why fixing dimensions comes before everything else.
How to find oversized images
Ask a testing tool. Google's PageSpeed Insights lists images that are larger than the space they are shown in, under a heading about properly sizing images.
Check in your browser. Right-click an image, choose Inspect, and hover over it. Browsers show both the size it is displayed at and its real ("intrinsic") size. If the real size is several times larger, the image is oversized.
Look at your media library. Sort by file size if your setup allows, or simply look for files measured in megabytes. A photo for a web page rarely needs to be more than a few hundred kilobytes.
Measure a whole page. The free WordPress image optimization test lists the images on any page with their dimensions and file sizes.
What WordPress already does for you
WordPress is better at this than its reputation suggests.
- It makes smaller copies. Every upload gets a set of sizes: by default 150, 300, 768 and 1024 pixels, plus 1536 and 2048 for high-resolution screens.
- It lets the browser choose. Images placed in posts carry a list of those sizes, and the browser downloads the one that fits the screen.
- It caps huge uploads. Since WordPress 5.3, an upload larger than 2560 pixels on its longest side is scaled down, and the scaled copy is used as the full-size image.
- It lazy-loads. Since WordPress 5.5, images further down the page are not downloaded until the visitor scrolls near them.
Where it falls short:
- Themes and page builders sometimes ask for the full-size image where a smaller one would do, most often in sliders, hero banners and backgrounds.
- 2560 pixels is still generous for most layouts.
- The original, untouched upload is kept on disk as well, which uses space.
- Nothing recompresses the full-size file or converts it to a modern format.
Choose the right dimensions
A workable rule: the full-size image should be about as wide as the widest place it will be shown, doubled if you want it sharp on high-resolution screens, and no more.
| Where the image is used | Sensible maximum width |
|---|---|
| Inside a post or page column | 1600 to 2000 pixels |
| Full-width banner or hero | 2560 pixels |
| Product gallery with zoom | 2560 pixels, or more if zoom needs it |
| Logos and icons | Use SVG where you can |
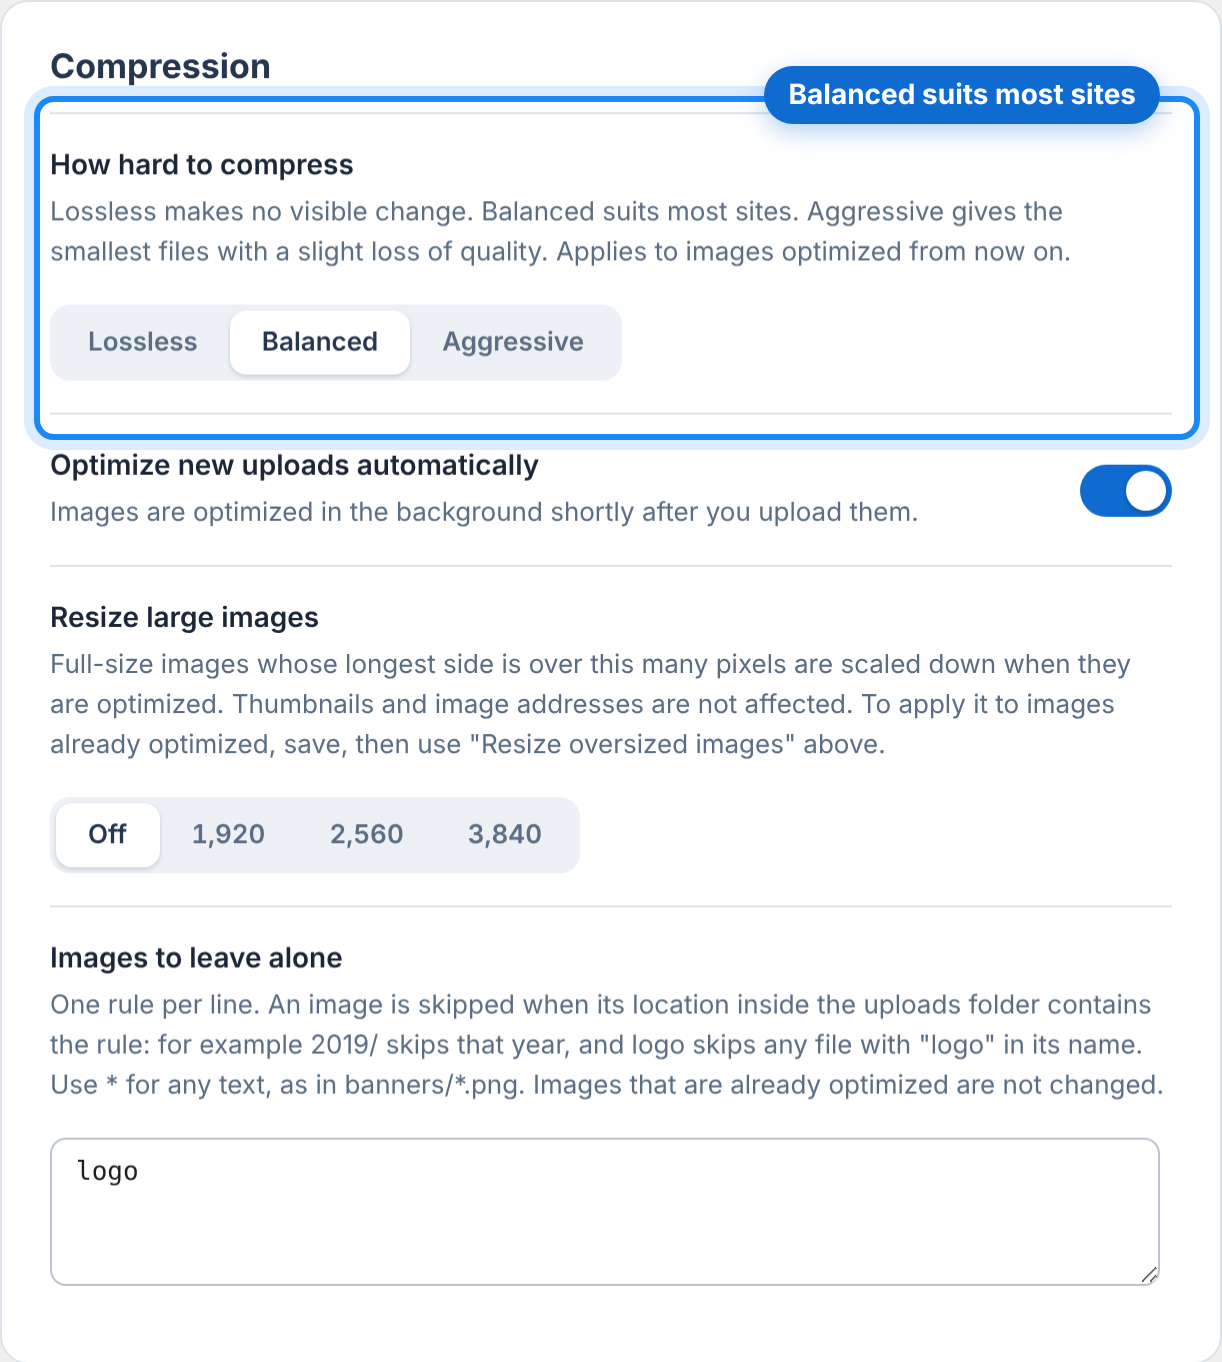
You can resize before uploading, in any photo app. Or let a plugin enforce a maximum so that nobody on your team has to remember. In LeanPixel, "Resize large images" scales anything over 1920, 2560 or 3840 pixels down when it is optimized, and can be applied to images already in your library.
Choose the right format
- JPEG for photographs.
- PNG for graphics with sharp edges, flat colour or transparency. A photo saved as PNG is far larger than it should be, and is one of the most common causes of a single enormous file.
- SVG for logos and icons, where your site allows it. It stays sharp at any size and is tiny.
- WebP and AVIF as smaller versions of either, served to browsers that support them. See WebP vs AVIF for WordPress.
Then compress
With dimensions and format right, compression takes off most of what remains.
- Compress the full-size image and every thumbnail size.
- Remove camera and location details (EXIF) unless you need them. It is a small saving and better for privacy.
- Add WebP and AVIF versions.
The order of work, and how to do it without visible loss, is in how to optimize WordPress images without losing quality.
Fix the images you already have
New habits do not shrink last year's uploads. Two things do:
- A bulk pass over the media library, with a maximum size switched on. See how to bulk optimize your WordPress media library.
- A look at your templates. If a slider or banner loads the full-size image on every page, changing that one setting in your theme or page builder can matter more than everything else.
A short checklist
- Find images whose real size is far larger than their displayed size.
- Set a maximum width that suits your layout.
- Use JPEG for photos and PNG or SVG for graphics.
- Compress, and strip camera details.
- Serve WebP and AVIF versions.
- Bulk optimize what is already uploaded.
- Let new uploads be handled automatically.
LeanPixel does steps 2 and 4 to 7 from one screen, and is free for 1,000 images a month.